Portrait Drawing (Charcoal) – A Step-by-Step Guide
Block in
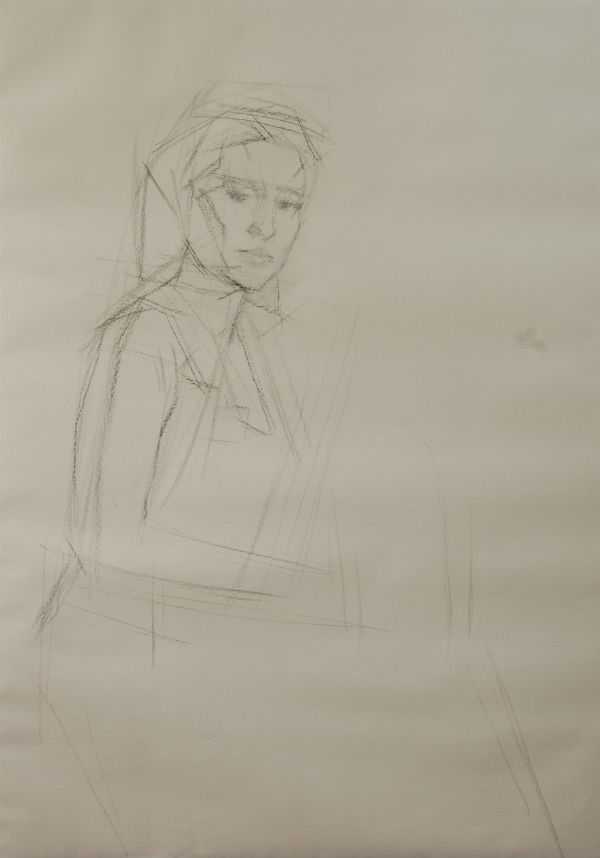
Since this is a charcoal drawing, I selected French-made MBM drawing paper. This sort of paper is very ideal for charcoal sticks. It holds charcoal powder very well, which is convenient for making dark areas darker. But a disadvantage is that it is harder to erase the charcoal powder to achieve lighter areas.
I started by using straight, long lines to define the scope of the subject. Then I drew the general shapes and positions of her neck, head, curved right arm, hip, legs, and the folds in her skirt. Next, I marked the proportions of her facial features and the pose of her head.
When blocking in, keep in mind the following: First, pay attention to the overall composition of the drawing – the size of the model and her position in the drawing. Second, make careful note of the movements, especially the relationship between the head and the chest as well as the arms and body. And third, pay attention to the proportions; for example: the length of the neck, forearms, and arms. Simply, the proportion and post of major parts must be accurate and in sync.
Define the head
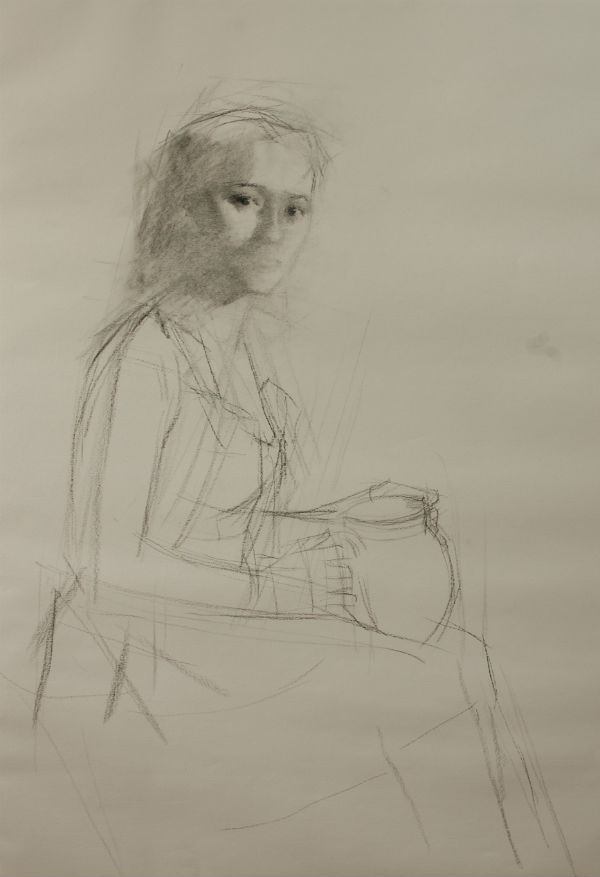
After blocking in the head, I further defined the head and pitcher. Then I came back to the head to add value. I used a piece of tissue paper to blend and create a middle value tone for the dark areas of the head.
Continue to define the head
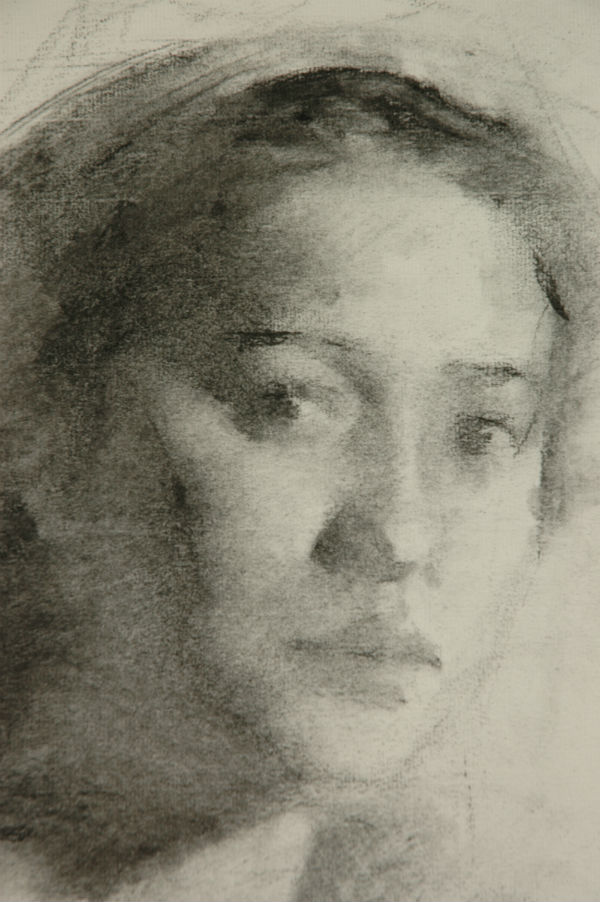
Further define the forehead, cheeks, jaws and other facial parts to create three dimensions. Please note that the value I created during this stage is lighter than the final value of the drawing. There are two reasons for this. First, creating really dark value at this point will make it difficult to make revisions later in form and placement. Secondly, fixing dark value now will limit flexibility in creating middle and light values. So for charcoal drawing, I will usually work on light value areas after blocking in and further defining the parts, and then move on to middle value and dark value areas.
Define large planes of middle and dark values
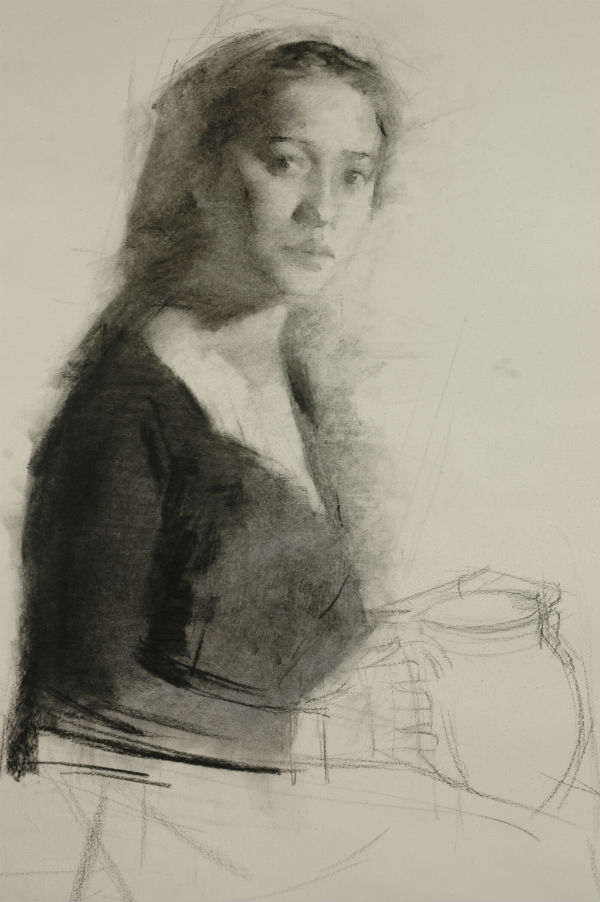
It is incredibly satisfying to block in large areas of mid-tone or dark values when working with charcoal. The image becomes solid and lively as the dark colors are added. At this stage, do not focus on small details. Instead try to capture the overall values and the contrast between light and dark. Large areas of mid-tone or dark values can bring out the beauty of a drawing. If one is trained to capture the contrast between light and dark in drawing, one would find it easier to block in color areas in oil painting.
Further define parts
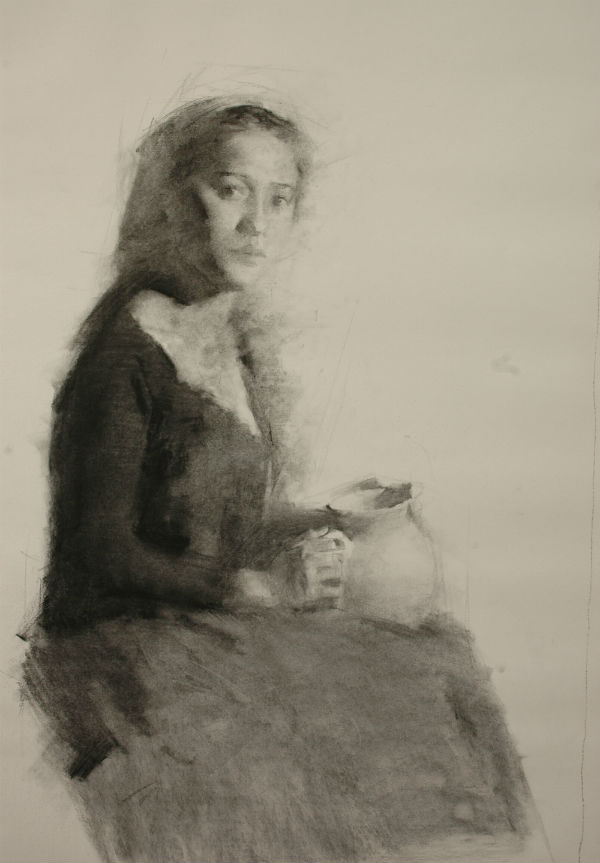
Next, further define the parts below the head – the hands, pitcher and dress. In order to create accurate forms of the hands, I try to distinguish the value variations among the hand, wrist, and fingers. When drawing the pitcher, pay attention to the dark areas and also the circular mouth and body of the pitcher. To draw the folds in her skirt, try to “feel” the beauty of the mid-tones and capture it on paper. From here onwards, the overall composition and structure as well as the large value blocks have been established. The drawing has been “set.”
Add details
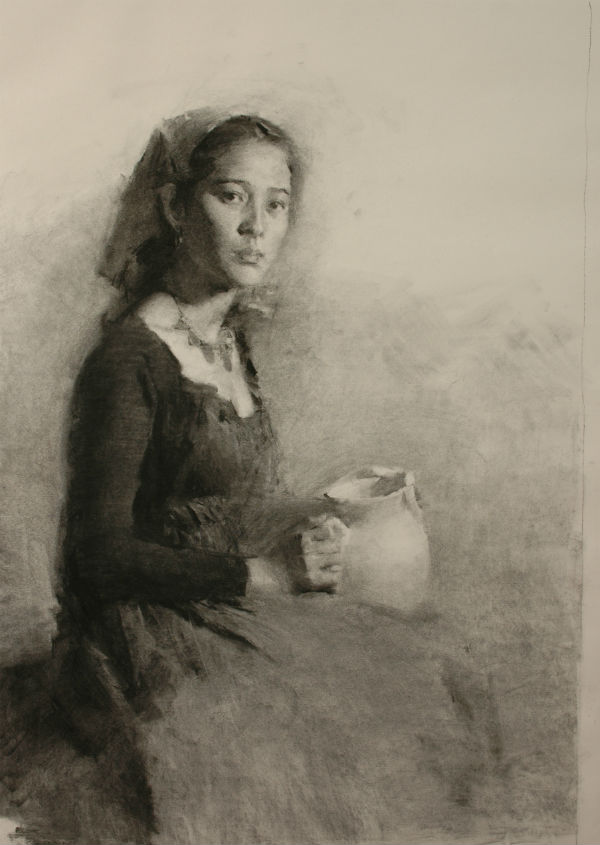
It is now time to add the details. Start from the head. Use various strokes to create believable, rich details. Creating details is not a process of mere addition but instead a process of iteration composed of addition and subtraction.
The next step is to create the light gray backdrop, to create space for the model in the drawing.
Skirt
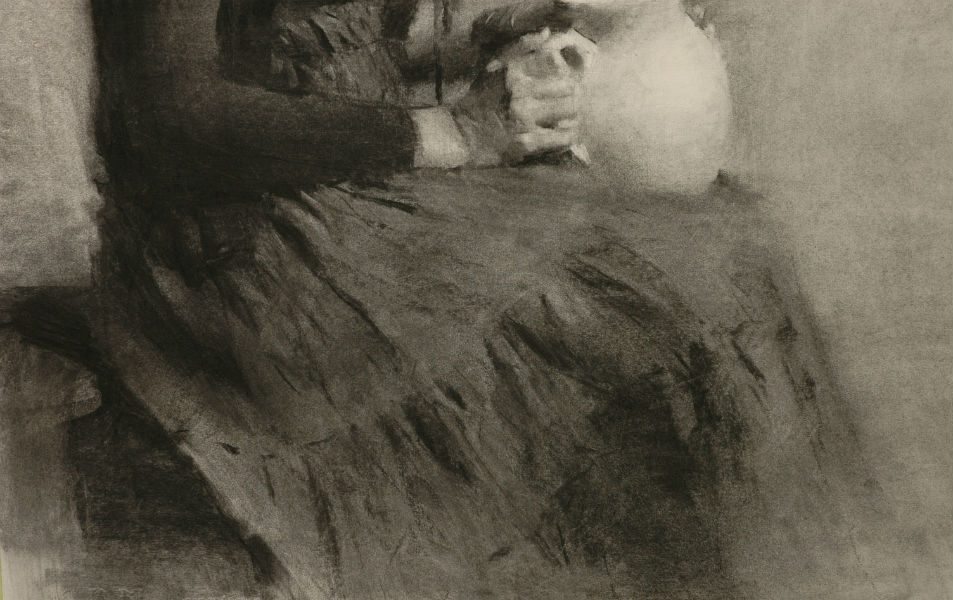
How to draw the skirt? The skirt is quite complicated because there are many folds in its tail, and every time the model got up to take a break, the pattern of the folds was changed. My approach is to draw the main shadowed areas and the most obvious folds first. Then I created the details of the smaller folds with my imagination, using the repetitive wrinkled strokes of Chinese landscape paintings to generate the proper form and texture. The free-flowing strokes make the drawing more interesting and exciting.
Hands
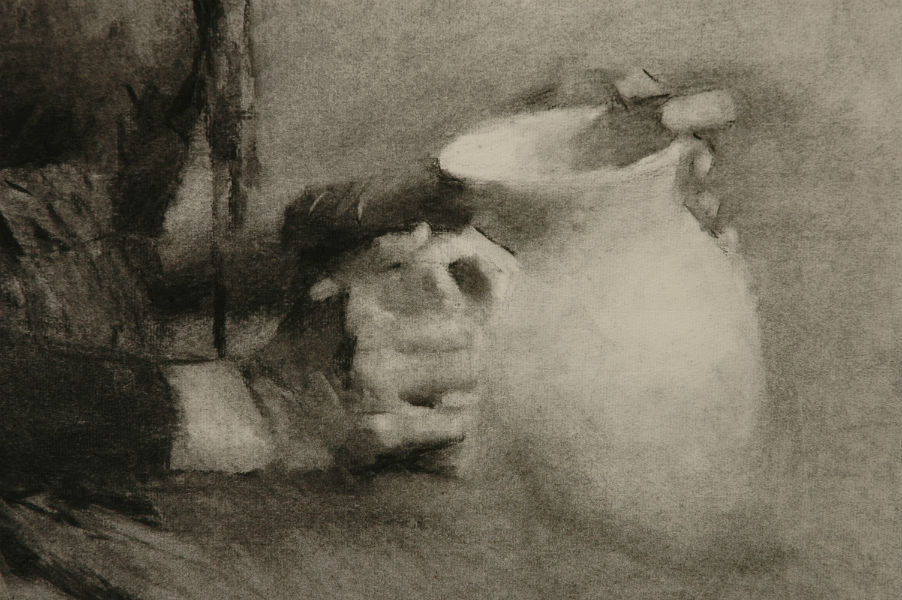
When drawing the hands, pay attention to the large joints and large facets. Do not put too much emphasis on the small details of the fingers. Charcoal sticks are most suitable for creating distinct strokes, facets and values, rendering artistic effects similar to an oil painting in style and presentation.
A hundred years ago, the Russian portrait master, V.A. Serov once said, “When one drowns oneself into making a drawing extremely specific and detailed, drawing loses its meaning.” How true that is! Surely, if every detail is drawn exactly as it is, the drawing would be no different from a photograph.
Head
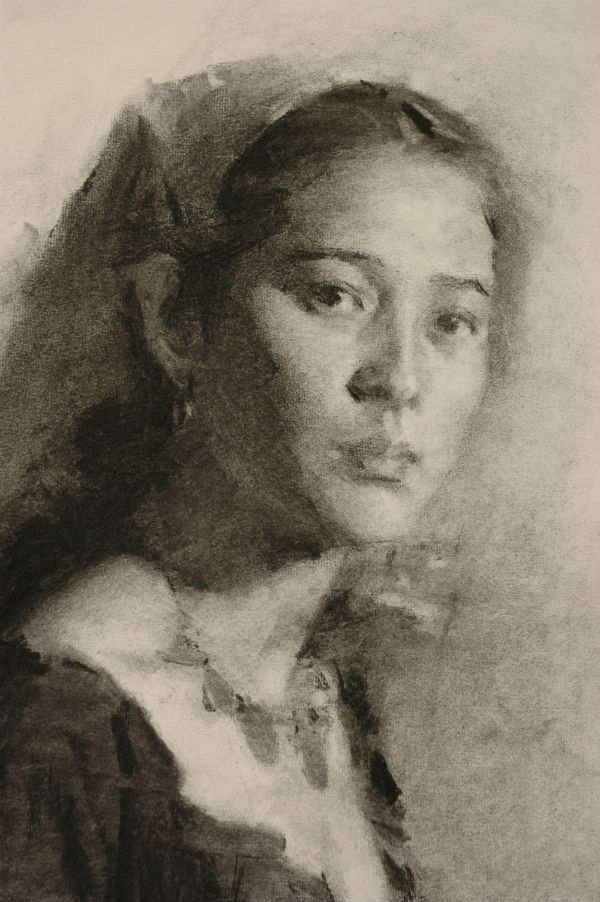
I revisited the details of the head. Over and over again I reworked the core shadows of the cheekbones and mandible multiple times. I also painstakingly worked to capture the unique expressions of the sitter: her contemplative eyes, her slightly raised eyebrows, and her delicate nose. Finally, I revisited the edges to create a balanced presentation of hard and soft edges. I double-checked the curves of the collarbone, head and shoulders, etc., as well as the shapes of her head scarf, earrings, and her right ear in the shadowed area. Last of all, I made final adjustments on the necklace made of coins. Now it’s time to call it a day.
Final drawing
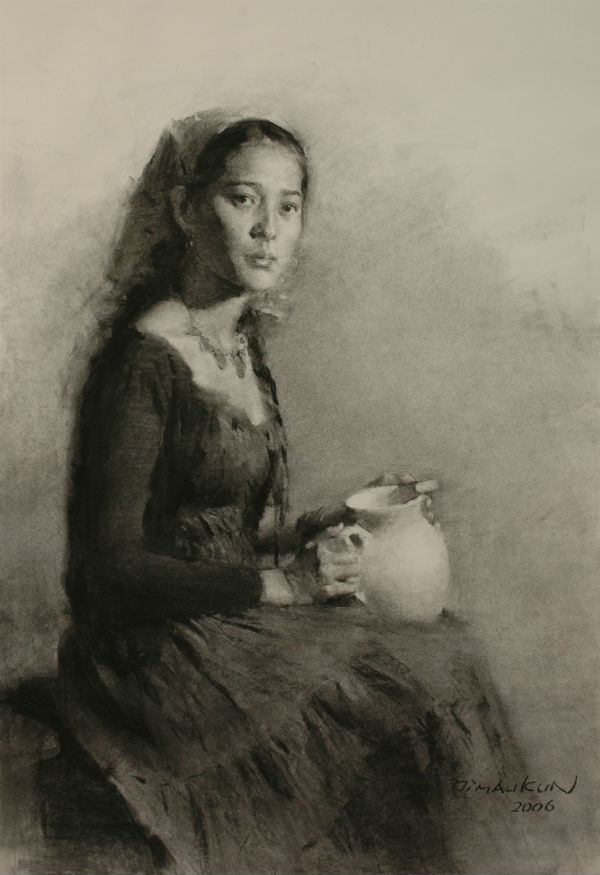
This is a piece of Western classical style drawing using chiaroscuro. However, I also integrated many principles of Chinese ink wash painting strokes in the presentation of the details. For the backdrop, I used a light grey to accentuate the sitter. The light grey background creates an ethereal sense of space which resembles those found in Chinese ink wash paintings.
In this lesson, you will learn
Strategy and methodology when drawing a portrait using charcoal – using a lighter tone during early stages so that it’s easier to make revisions later if needed; when refining value nuance, first work light values, then middle values and lastly dark values
Block in – use straight lines to block in, defining the scope, composition, movement (insert link of lovelifedrawing) and proportion of the portrait
Define tonal shapes of middle and dark values – starting from the head, ignore details during this stage
Further define parts – starting from the head, then parts below the head
Render details of the skirt, hands and the head – using iteration of additional and subtraction and various strokes
Suggested exercise
Ask or hire a friend to sit for you for life drawing or join a local life drawing meet-up to practice.
We have included a few images of portrait drawing in the course materials for you to study if you wish. However, we strongly recommend that you practice life drawing.
Additionally if you have not done cast drawing and head drawing before, we also recommend doing cast drawing and head drawing as part of your practice. Still life drawing practice will also be helpful as it helps you study composition, perspectives, proportion, spatial relationship and how to render different surface textures.

